The eight steps of a lockout are always the same and always in the same order. This is not bureaucracy: each step is where it is because the accident happens when that particular step is missing. Skipping verification does not save time; it shifts the risk to the moment someone reaches in.
This guide walks through the eight steps one by one, with what usually goes wrong at each. For the equipment —padlocks, devices for each isolation point, group lock boxes— see the LOTO lockout and tagging guide; and for choosing the padlock, the guide to body material, shackle and key system.
Why the order is not negotiable
The procedure moves from the general to the specific and ends where it began: identify, notify, shut down, isolate, lock out, dissipate, verify and remove. Each step leaves the machine in a known state before moving on to the next.
Changing the order breaks that chain. Locking out before isolating leaves the padlock on a point that is still supplying energy. Verifying before dissipating gives a reassuring reading on a circuit that still holds pressure. And removing the locks before checking that the area is clear restores energy with someone still inside.
Steps 1 and 2: preparation and notification
Preparation means knowing, before touching anything, how many energy sources the equipment has, where the isolation point for each one is and which device is needed to lock it. This is not improvised in front of the machine: it is written once, per machine, and consulted.
A useful written procedure fits on one page and answers four questions: which sources there are, where each one is cut off, what locks them and how to check that they are at zero. If the document does not allow someone else to carry out the lockout without asking, it is not finished.
Notification is the step most often forgotten because it seems trivial. Informing whoever operates the machine and whoever depends on it prevents two things: someone trying to restart it, and the shutdown taking a downstream process by surprise.
Steps 3 and 4: shutdown and isolation
The machine is shut down using its normal stopping procedure, not by cutting the power abruptly. A sudden stop can leave the equipment in an unstable position —a shaft mid-stroke, a suspended load— that complicates everything that follows.
Isolation means operating every isolation point identified during preparation: disconnectors, circuit breakers, valves, compressed air couplings. Be literal with the inventory here. Electrical energy is the one everyone remembers; pneumatic, hydraulic and gravitational energy are the ones left off the list.
Step 5: lockout and tagging
On each isolation point already isolated, the lockout device is fitted, closed with the personal padlock, and the tag is attached. Three details make the difference between a real lockout and an apparent one.
One padlock per person. If three operators work on the machine, there are three padlocks. A lockout hasp takes several on the same point, and the point is not released until the last one comes off.
The key is never left in the lock. It goes in the pocket of whoever fitted the padlock. A closed padlock with the key hanging next to it protects no one.
The tag says who and why. Name, date and reason. Without that, anyone arriving at the panel has to start asking around, and that friction is what pushes people to skip the procedure.
Step 6: dissipating residual energy
Isolating cuts off the supply; it does not empty what is already inside. An isolated machine can still hold compressed air in its cylinders, pressure in the hydraulic circuit, a charged capacitor, a flywheel spinning by inertia, a compressed spring or a raised load held up only by the pressure that has just been cut off.
That is why this step is about bleeding, discharging, supporting and waiting: bleed the pneumatic and hydraulic lines, discharge the capacitors, chock or lower suspended loads, mechanically block anything that could move under gravity and let anything hot cool down.
Step 7: verification, the step most often skipped
Verification has two halves, and both are needed. The first is trying to start the machine with the normal controls: if it does not start, the isolation works. Once this is done, the controls are returned to the stop position.
The second is checking with an instrument for the absence of energy at the point where the work will be done: a voltage tester on the electrical circuit, a pressure gauge on the pneumatic or hydraulic one. And the tester is checked before and afterwards against a known source, because a faulty tester indicates absence of voltage just as convincingly as a genuinely dead circuit.
It is the step most often omitted because the previous seven create a feeling of safety. It is exactly the other way round: it is the only one that proves it.
Step 8: removal
Removal is done in reverse order and with one rule that admits no exceptions: each operator removes their own padlock. First, they check that the tools are out, the guards are back in place and no one is left in the area.
When the last padlock comes off, the person in charge restarts the machine and announces that it is available again. That notice closes the cycle opened in step 2.
The eight steps at a glance
| Step | What is done | Common failure |
|---|---|---|
| 1. Preparation | Inventory sources, isolation points and devices | Doing it from memory, in front of the machine |
| 2. Notification | Inform operators and supervisors | Skipping it because it seems trivial |
| 3. Shutdown | Stop using the normal procedure | Cutting power abruptly and leaving unstable loads |
| 4. Isolation | Operate every isolation point | Isolating only the electrical energy |
| 5. Lockout and tagging | Device, personal padlock and tag | A shared padlock; the key left in the lock |
| 6. Residual energy | Bleed, discharge, support, cool | Confusing isolating with emptying |
| 7. Verification | Start attempt + instrument reading | Skipping it, or not checking the tester |
| 8. Removal | Each person removes their own, then restart | Removing someone else's padlock |
The eight steps are applied in this order. The failures in the third column are what turn a lockout into a box-ticking exercise.
Group work and shift changes
When several people are involved or the work spans a shift change, individual lockout is not enough. The usual solution is the group lock box: the keys to the padlocks isolating the machine are kept inside, and each operator closes the box with their own padlock. No one can retrieve the keys while a single padlock remains in place.
At a shift change, the incoming operator fits their padlock before the outgoing one removes theirs. The point is never left unlocked, not even for a second.
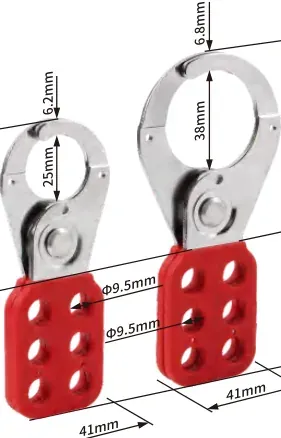 Lockout hasp
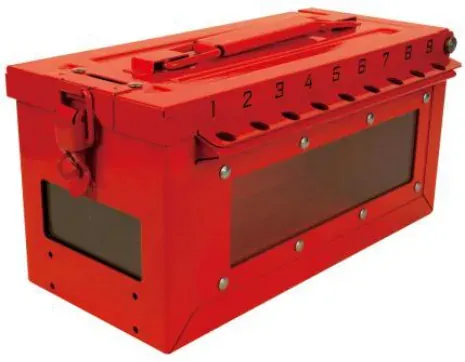 Group lock box
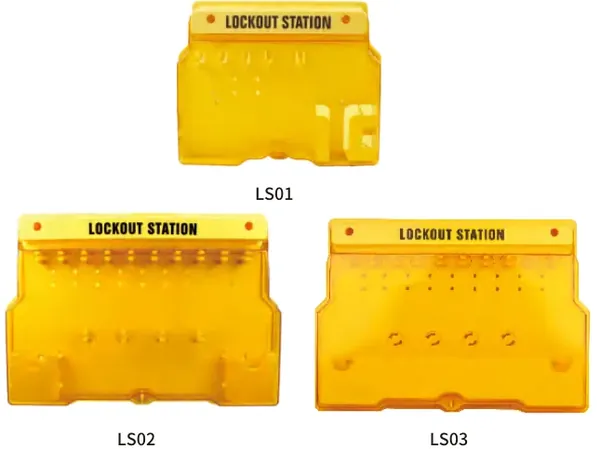 Lockout station
When someone else's padlock has to be removed
It happens: someone leaves with the key in their pocket and the line stays down. Having a master key to resolve it is reasonable; what cannot happen is for it to be used out of habit.
Exceptional removal requires, at the very least, three things in writing: who is authorised to decide it, what checks must be made beforehand —confirming that the person is not on site and that the area is clear— and how they are informed on their return. Without that procedure, the master key turns the personal padlock into an ornament.
What the regulations require in the EU
The eight steps are not an industry habit: they put into practice obligations that EU legislation divides between two parties. On one side, the employer who uses the machinery; on the other, the manufacturer who designs it and places it on the market. It is worth telling them apart, because each is met in a different way.
The employer's obligations
- Directive 89/391/EEC, the framework directive on safety and health at work. It requires risks to be assessed and preventive measures to be planned, including working procedures.
- Directive 2009/104/EC on the use of work equipment. Each item of equipment must have clearly identifiable means of isolating it from each of its energy sources: these are the isolation points listed in step 1. Maintenance must be possible with the equipment shut down.
- Each Member State transposes both directives into its own legislation, which may add more detailed requirements. The procedure must follow the rules of the country where the site is located.
- EN 50110-1, on the operation of electrical installations, sets out the five rules for working dead, taken up by national standards across Europe.
| Rule | What it requires | Step in the procedure |
|---|---|---|
| 1. Disconnect completely | Open all sources of supply | Steps 3 and 4 |
| 2. Secure against reconnection | Lock the switching device and label it | Step 5 |
| 3. Verify that the installation is dead | Test with an instrument at the place of work | Step 7 |
| 4. Earth and short-circuit | Connect to earth the conductors to be worked on | After step 7, for electrical work |
| 5. Protect against adjacent live parts | Cover or fence off nearby live parts | Before work begins, around the work area |
The five rules of EN 50110-1 and the step of the LOTO procedure in which each one is met.
The machinery manufacturer's obligations
- Regulation (EU) 2023/1230 on machinery, which replaces Directive 2006/42/EC and applies from 20 January 2027. Like the directive, it requires machinery to have means of isolating it from all its energy sources, clearly identified and lockable when reconnection could endanger people.
- EN ISO 12100, general principles for design and risk assessment, and EN ISO 14118, prevention of unexpected start-up. They describe how to isolate and dissipate energy and how to make the isolating means lockable.
In practice, the manufacturer delivers a machine that can be isolated and locked. The employer has to turn that into a written procedure, train staff and provide the equipment. The eight steps are that procedure.
Outside Europe, the usual references are OSHA 29 CFR 1910.147, in the United States, and ANSI/ASSP Z244.1, which many multinationals apply in their internal procedures. They do not replace European or national legislation.
This summary is for guidance only. The risk assessment and the procedure for each installation must be drawn up with the company's health and safety service.
Summary
The order protects: identify, notify, shut down, isolate, lock out, dissipate, verify and remove. Each step leaves the machine in a known state before the next.
The two steps most often omitted are the dissipation of residual energy and verification, and they are precisely the ones that separate a machine that appears stopped from a machine that is demonstrably de-energised.
The padlock is personal and so is the key. Anything that erodes that principle —shared padlocks, keys hanging next to the lock, master keys without a procedure— hollows the system out from within, even if the locks keep being fitted.
Behind the procedure is the law: EU directives require employers to work on equipment that is shut down, isolated and protected against start-up, and EN 50110-1 adds the five rules for electrical work.
The material to apply it — personal padlocks, multiple lockout hasps, group lock boxes and stations — is in the LOTO safety section, with references and dimensions for each family.
Frequently asked questions
How many steps does a LOTO procedure have, and in what order?
Eight, and the order is not interchangeable: preparation, notification, shutdown, isolation, lockout and tagout, dissipation of residual energy, verification and removal. Each step leaves the machine in a known state before moving to the next.
Which steps are most often skipped?
Dissipating residual energy and verification. They are the two that separate a machine that looks stopped from a machine that is demonstrably de-energised: isolating the cut-off point does not empty what is already inside the circuit.
How do you verify that a machine really has no energy?
With two checks, not one: an attempted start-up using the normal controls and a measurement with an instrument at the work point. And by checking first that the instrument itself works.
What do you do when several people are involved or there is a shift change?
You use a group lock box: the keys to the padlocks isolating the machine are kept inside and each operator closes the box with their own padlock, so nobody recovers the keys while one remains in place. At a handover, the incoming worker fits their padlock before the outgoing one removes theirs.
Can another person's padlock be removed?
Only as an exception and with a written procedure: who is authorised to decide it, what is checked beforehand — that the person is not on site and the area is clear — and how they are informed on their return. Without that, the master key turns the personal padlock into an ornament.
Which regulations require a lockout procedure in the EU?
Framework Directive 89/391/EEC, which requires risks to be assessed and working procedures to be planned, and Directive 2009/104/EC on work equipment, which requires means of isolating equipment from its energy sources and maintenance with the equipment shut down. Each Member State transposes them into national law. For electrical work, EN 50110-1 adds the five rules for working dead. The eight-step procedure is the usual way of complying with them.